Cabinet Continued
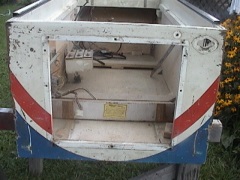
Next came the actual painting. I taped off the metal rails and other areas where I didn't want to get over spray. The base color was white. It took about three coats of Krylon gloss white. The head was a little more difficult than I expected. The design was very simple. However, even though it was simple, the two colors had to line up exactly. In fact, because of the simplicity of the design, if it was not lined up exactly, any mistakes were very noticeable.
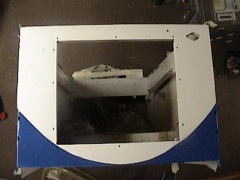
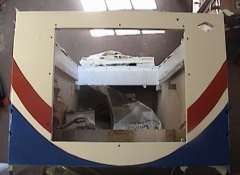
When doing some complicated designs, it doesn’t matter if the designs are off a little. But on this one, it made a huge difference. When I did the head, the stencils were off just a little bit. This required doing a little “touch up” on one side. I had to tape off and re-do a couple of areas around the square “card” shapes where the colors did not line up correctly. On the other side, since I knew this was a problem, I was able to compensate for it when I applied the colors. The cabinet sides and front were very easy. The two colors never overlap, so they were straightforward and easy to do. The only problem I had here was that a little underspray occurred.
After all three colors were applied, I sprayed two to three coats of Krylon Crystal Clear to the whole machine. While the coin door was removed, I polished it on the outside using a polishing compound and a dremel with a polishing attachment. I then put on a new Bally sticker. This really spruces up the game.
Playfield
The playfield was in good shape for a game this old. It had some wear beside the saucer. The lower half of the playfield has been covered with Mylar. There had been some wear prior to the application of this Mylar. I decided NOT to remove the Mylar since the wear was not too bad.
I stripped and cleaned the entire playfield. The metal posts and parts were polished in a rock tumbler using corn cob media. The plastic posts were cleaned. New rubber was installed.
As with many of these older games, the internal metal parts had quite a bit of rust on them. I removed the lock down bar mechanism and the glass channel in the rear. These were very rusty. I then soaked them in Lightning Rust Remover to get rid of most of the rust. I then sanded them using a sander and then a dremel to get the tight places. Finally, I painted them with a chrome color paint. I also painted the playfield support brackets that “hook” into the lock down bar mechanism.
Finally, I repainted the ball shooter cover. The original one had a lot of rust on it. If I tried to remove the rust, the paint would also come off, so I decided to repaint it. This was not as easy as it looks. In fact, I had to do it twice, because I wasn’t pleased with the results the first time. You can see the results of both the "bad" attempt and the final product here. Here are the procedures I used for repainting the shooter cover.
On the first try, I tried to duplicate the original exactly. I stripped the old paint off and then sanded it down to the bare metal. The original was painted with blue first. Then the white was applied, and then the red. In trying to recreate the original, there were some difficulties. That is why the first try didn’t quite work and I had to retry it. If you will notice the colors on the original, the blue was applied first. Then the white was put on. However, you had to mask the little blue triangle and circle “depth” guides on the side so that the blue would remain. I used friskett paper to try to make the masks. I put the friskett paper on another Bally shooter (They are all the same design, just different color schemes). I then cut out the triangles and circles and moved them to the Blackjack shooter. The pieces were hard to work with because they were so small. So, they weren’t as precise as I would have liked. If you notice the picture, you can see how amateurish it looked. So, I decided to re-do the shooter using plastic circle and triangle stencils that I bought at Hobby Lobby. The end result is that the design is not exactly like the original, but it still looks better than the original rusty shooter cover. On other games, I've printed stencils for the shooter but I didn't do that on this game.